How to Add a New Mailbox on iPhone iOS 18 (iCloud, Gmail, Yahoo & Outlook)
If you're juggling more than one inbox or email address, it can be challenging to keep track of multiple email apps—especially for business users and anyone managing personal and professional email. Fortunately, your iPhone and Apple Mail make it super simple to add and manage new mailboxes. Whether you're setting up iCloud, Gmail, Yahoo, or Outlook, we've got you covered with the correct steps in this step-by-step guide.
📱 Why Add a Mailbox to Your iPhone?
Adding the Apple Mail mailbox on your iPhone lets you:
Stay synced across devices and monitor more than one email address at a time.
Access all your important messages in one place
Easily switch between personal and business accounts
Use built-in features like notifications, filters, and VIP inbox
🛠️ How to Add a New Mailbox on iPhone
✅ Step 1: Open Settings
Locate and tap the Settings app on your iPhone.
Can’t find your settings?
If you can't find it, you can swipe down from the top of the page and search for Settings.
✅ Step 2: Navigate to Mail > Accounts > Add Account
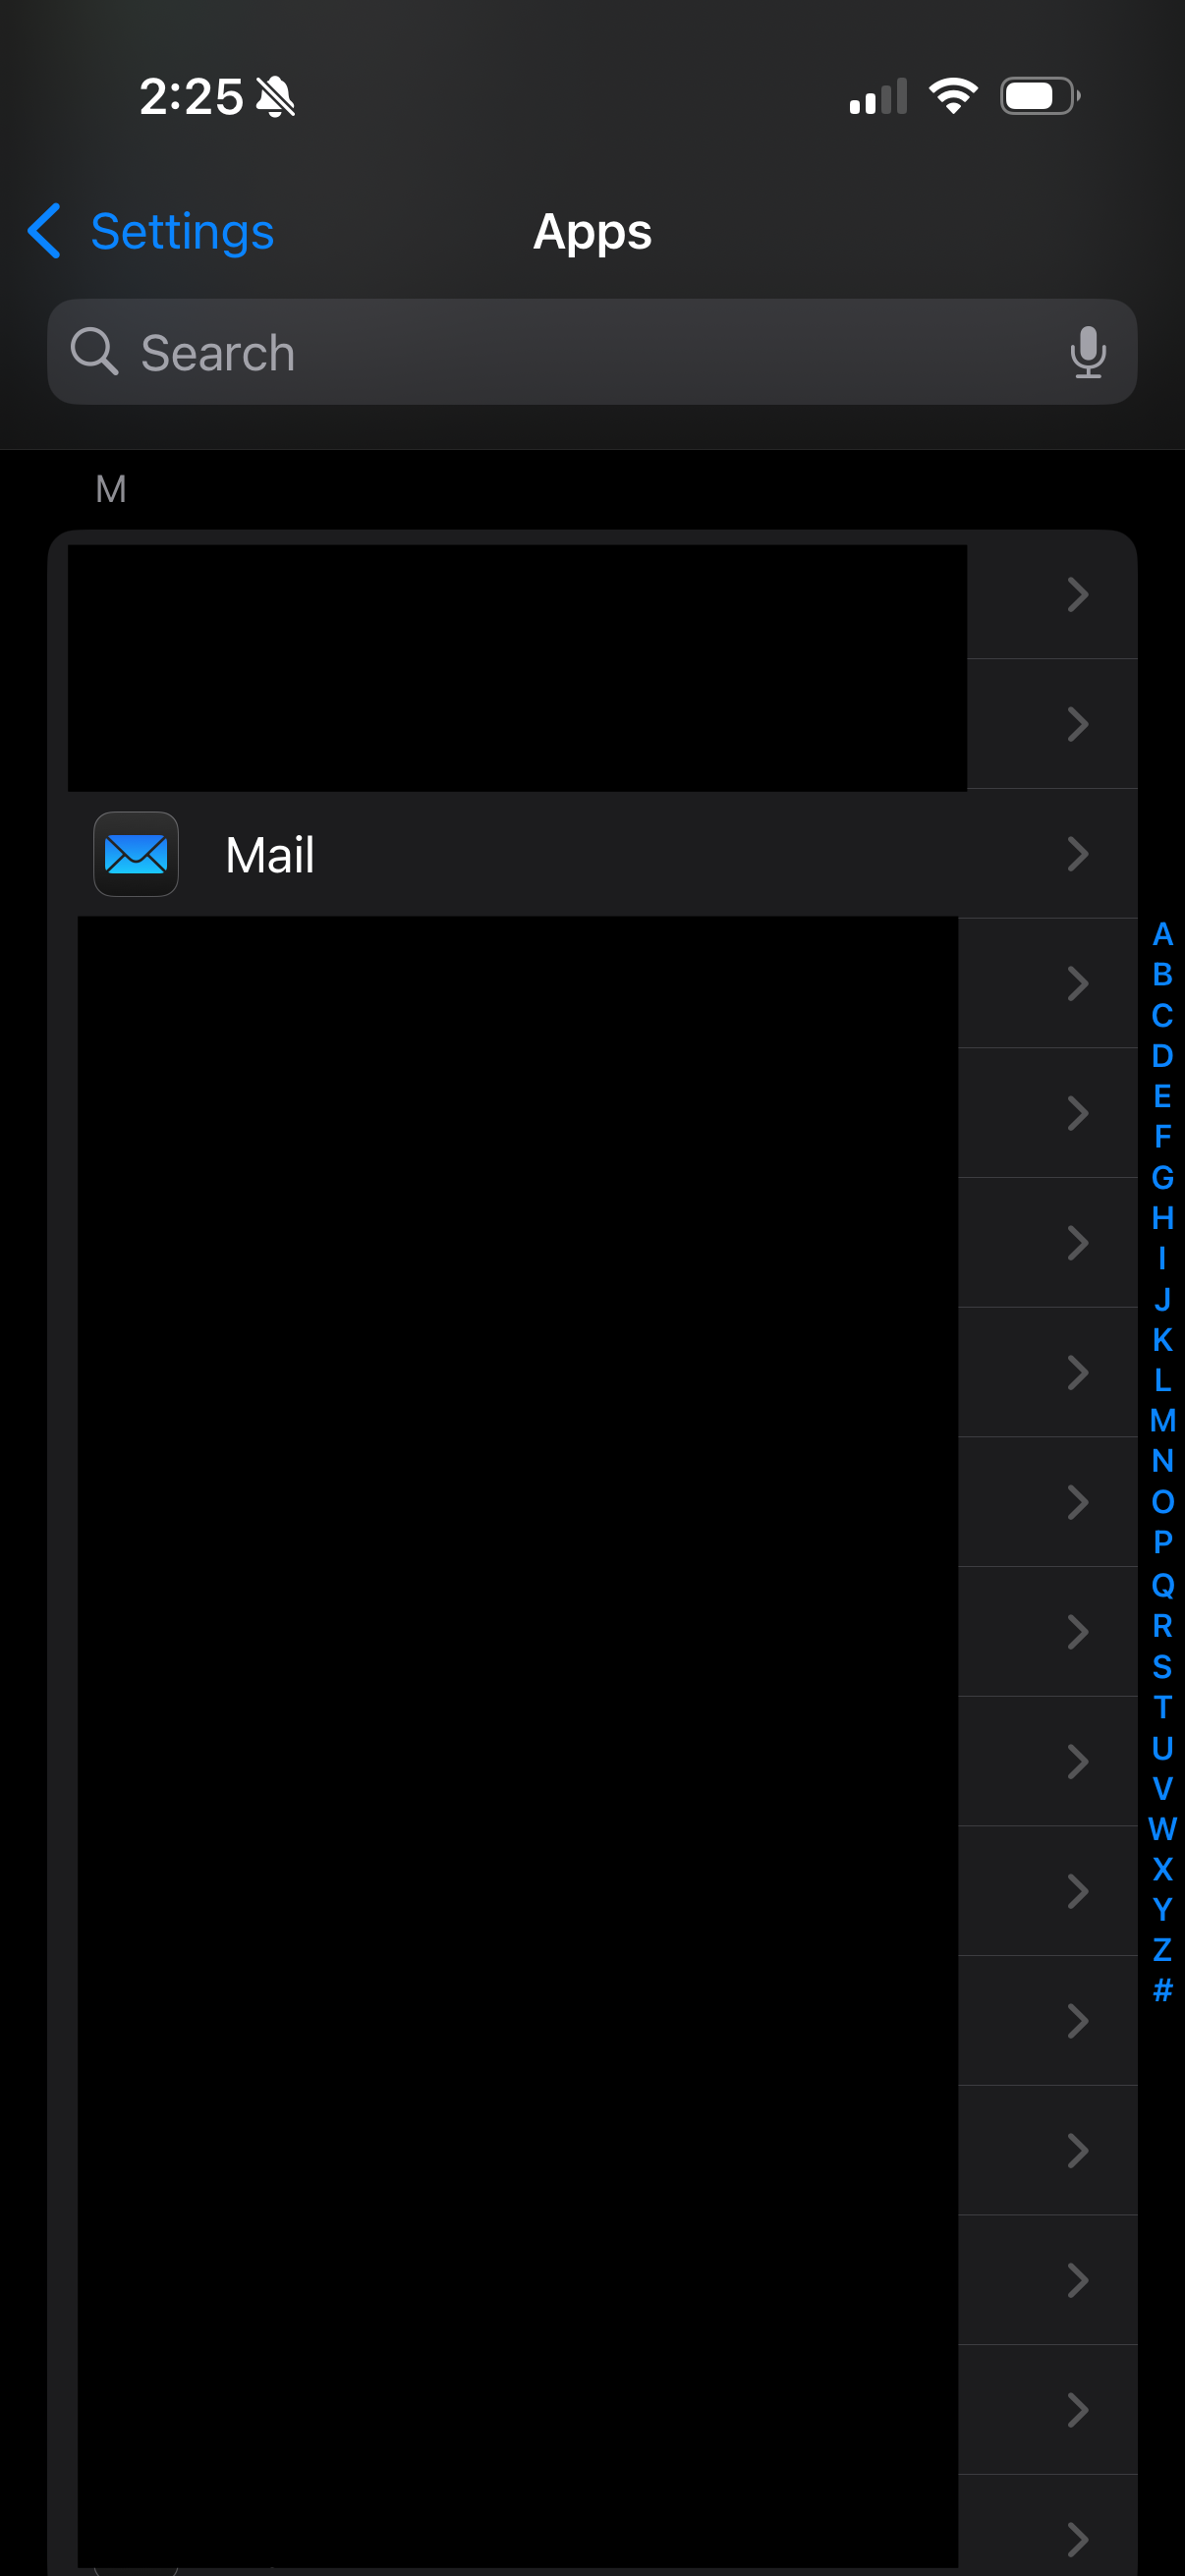
Scroll down, tap Apps, and then find Mail.
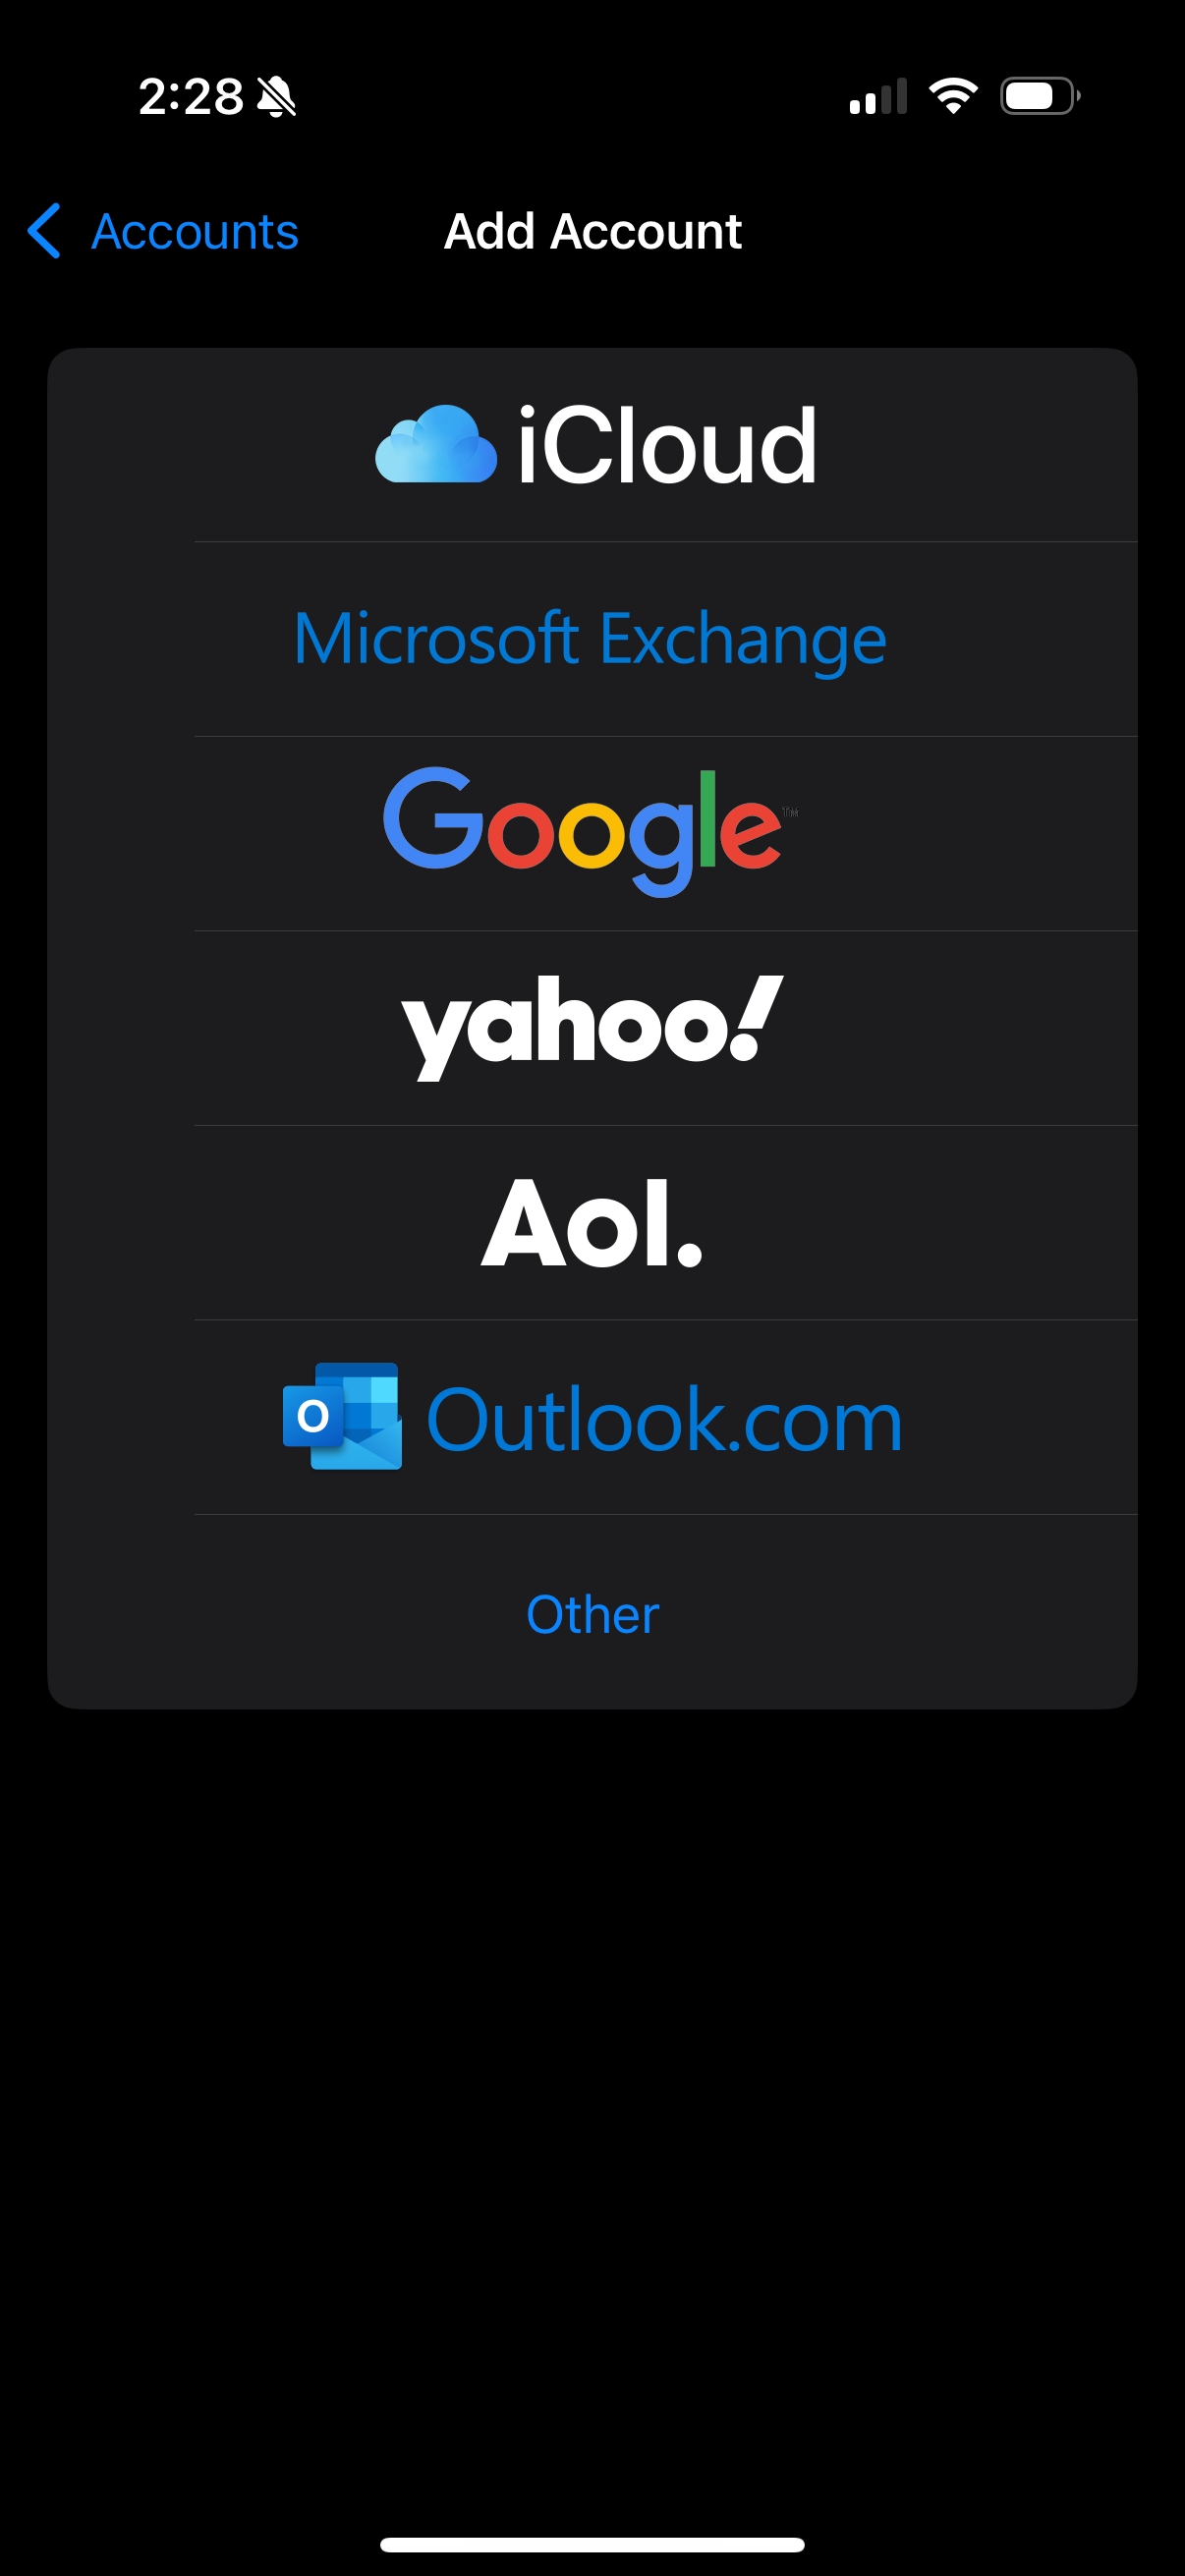
Then go to Accounts > Add Account.
If you are having trouble finding Mail in your settings, you may need to install the app. You can find it on the Apple App Store by searching for Mail. Once installed, you can navigate back to settings to complete these steps.
Use the alphabet on the right side to quickly navigate to your Mail App settings.
You can find the Mail App on the Apple App Store by searching for Mail.
✅ Step 3: Choose Your Email Provider
At the top of the screen, click Mail Accounts, then click Add Account. Select your mailbox provider:
iCloud
Gmail
Yahoo
Outlook
Or tap “Other” for custom domains
Not finding your email provider?
You can always click “Other” to add a custom email provider.
✅ Step 4: Sign In to Your Email Account
Enter your email address and password, and follow the screen prompts.
Login Redirects?
Some providers (like Gmail or Outlook) may redirect to a secure login page.
✅ Step 5: Select What You Want to Sync
Choose the data to sync with your iPhone:
Mail
Contacts
Calendars
Notes
Toggle on what you want, then tap Save.
PRO TIP
If you're not sure what settings you want turned on, you can always go back and change these settings later.
🎉 Your new mailbox is now active and ready to use in the iPhone Mail app!
📂 Bonus Tips: To Get The Most Out of Apple Mail
From the Mail App home page, you can see a list of Mailboxes and all your email folders
Use the “All Inboxes” view to see messages for every email address inbox at once.
Change your Email Per Account in the Signature Section of the Mail App Settings.
Set a default account:
Settings > Mail > Default Account
The All Mail tab shows you emails from every account you have added.
Change your Default Mail App in settings to show your most important mail in the Mail App first. Just click the “Primary” tab in All Inboxes to use this feature.
📬 Wrapping Up
Adding a mailbox to your iPhone takes just a few minutes and helps you stay organized and avoid juggling multiple email apps. Whether you're managing business communications or staying connected with loved ones, this simple setup makes a huge difference.


